
When you first dive into DTF printing, the promise of vibrant, full-color transfers on almost any fabric is exciting. But the reality often hits hard: prints crack, colors look dull, or the transfer peels off after a few washes. I've been there. After countless trials, wasted film, and ruined shirts, I've distilled the key practices that separate professional results from amateur frustration. This guide shares those insights, so you can achieve flawless DTF transfers consistently.
Understanding the DTF Printing Process
DTF, or Direct-to-Film, is a digital printing method where your design is printed onto a special PET film, coated with a hot-melt adhesive powder, and then heat-pressed onto the garment. Unlike DTG or screen printing, DTF works on cotton, polyester, blends, and even treated nylon. The process involves several steps, each critical to the final outcome.
Step 1: Design Preparation
Start with a high-resolution image. Vector files are ideal, but 300 DPI PNGs work well. Remember that DTF prints white ink as a base, so transparency matters. If your design has white areas, ensure they are actual white pixels, not transparent. Also, mirror your image horizontally before printing; otherwise, your text will be reversed.
Step 2: Printing onto Film
Use a dedicated DTF printer with pigment inks. The printer lays down a layer of white ink, followed by CMYK colors. The quality of your printer and ink matters: cheap inks may clog and produce weak colors. Maintain your printer regularly, and always perform a nozzle check before a big job.
Step 3: Powder Application
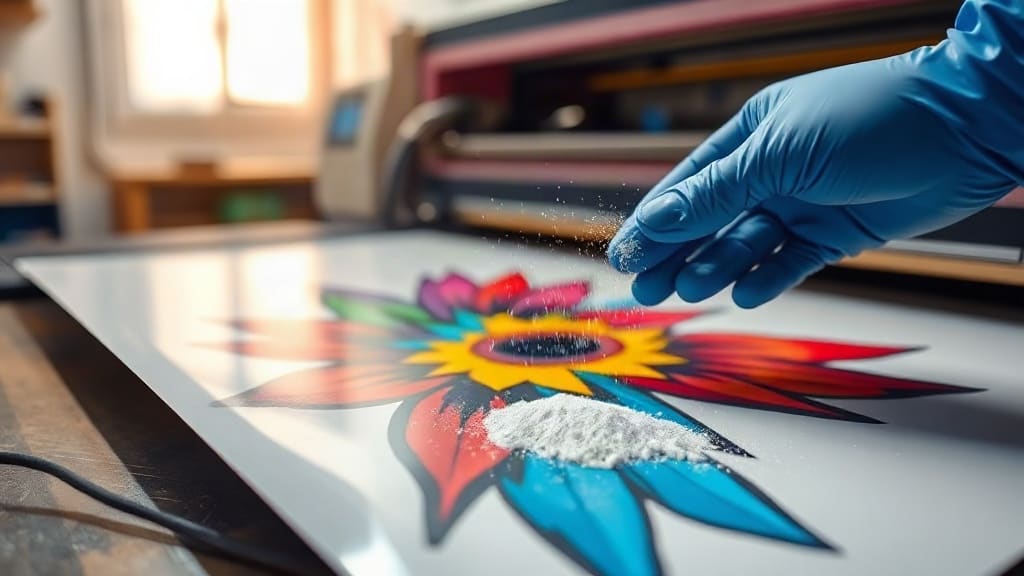
After printing, while the ink is still wet, sprinkle hot-melt adhesive powder evenly over the film. Too little powder means poor adhesion; too much creates a rough texture. Shake off excess gently, then cure the powder under a heat source until it melts and becomes glossy. This step is where many beginners fail, so pay close attention.
Step 4: Heat Pressing
Set your heat press to 320°F (160°C) with medium pressure. Place the transfer on the garment, cover with a Teflon sheet or parchment paper, and press for 15-20 seconds. Peel the film while it's still warm (warm peel) for best results. If you wait until it's cold, the adhesive may set too hard and cause peeling.
Common DTF Problems and How to Fix Them
Even with the right steps, issues arise. Here are the most frequent complaints and their solutions.
Print Cracking After Wash
Cracking usually means insufficient powder or under-curing. Increase the amount of powder slightly, and make sure it's fully melted. Also, check your heat press temperature; if it's too low, the adhesive won't bond properly. I recommend using a infrared thermometer to verify the actual platen temperature, as dials can be off by 20 degrees or more.
Dull or Faded Colors
Faded colors often result from low ink saturation or poor film quality. Try increasing the ink density in your RIP software settings. Also, ensure your film is coated for DTF; using wrong film will repel ink. If colors still look weak, your ink might be expired or incompatible with your printer.
Transfer Peeling Off
Peeling can happen if the garment wasn't pre-pressed to remove moisture, or if the pressure was too low. Always pre-press the shirt for 5-10 seconds to eliminate wrinkles and moisture. Then, increase pressure and ensure the transfer is fully cooled before stretching the fabric.
Choosing the Right Supplies for DTF Printing
Not all DTF supplies are created equal. Here's what to look for.
DTF Film
Look for double-sided matte film. It should be coated to accept pigment ink and release cleanly. Thinner films (75-100 microns) are easier to handle but may wrinkle; thicker films (100-125 microns) are more forgiving. I prefer 100-micron film for a balance of durability and ease.
DTF Powder
Use thermoplastic polyurethane (TPU) powder with a particle size of 80-200 microns. Finer powder gives a softer hand feel but requires more careful application. Coarser powder is more forgiving but may feel gritty. Experiment to find your preference.
Inks
Pigment inks designed for DTF are essential. They must be compatible with your printhead. Some users try to cut costs with generic inks, but this often leads to clogged nozzles and poor color gamut. Stick with reputable brands.
Advanced Tips for Professional Results
Once you've mastered the basics, these tips can elevate your DTF game.
Use a RIP Software
RIP (Raster Image Processor) software gives you control over ink limits, color profiles, and white ink density. It's an investment, but it pays off in consistency and color accuracy.
Test on Scrap Fabric
Before pressing onto a final garment, do a test press on similar fabric. This helps you dial in temperature, pressure, and time without risking a costly item.
Store Transfers Properly
If you're not using transfers immediately, store them in a cool, dry place away from direct sunlight. Stack them with parchment paper between layers to prevent sticking.
Frequently Asked Questions About DTF Printing
How long do DTF transfers last?
With proper application and care, DTF transfers can last 50+ washes. Always wash inside out in cold water and tumble dry low or hang dry.
Can I use DTF on dark shirts?
Absolutely. DTF prints a white base layer, so colors pop on dark fabrics. Just ensure your design has enough white ink density.
What's the difference between DTF and DTG?
DTG prints directly onto the garment, while DTF prints onto a film then transfers. DTF works on more fabric types and often has better durability.
Do I need a special printer for DTF?
Yes, you need a DTF printer that uses pigment inks and has a white ink channel. Converted Epson or Ricoh printers are popular choices.
How do I prevent powder from getting everywhere?
Use a powder shaker or a dedicated powder application station. Work in a well-ventilated area and wear a mask to avoid inhaling particles.