
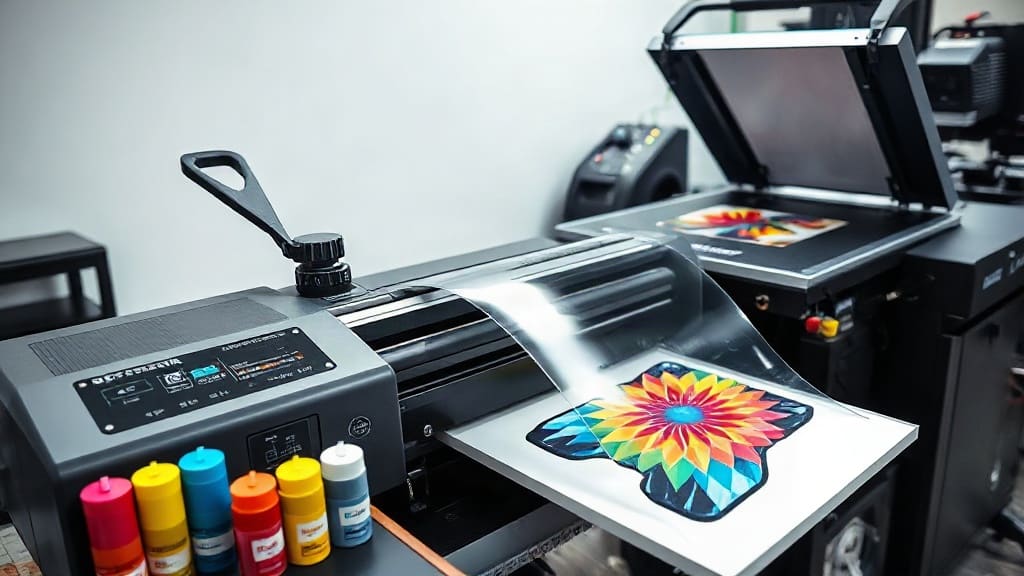
If you've been searching for a versatile and cost-effective way to create custom apparel, DTF transfers are likely the answer. This printing method has taken the industry by storm, offering a simple yet powerful solution for producing vibrant designs on a wide range of fabrics. Whether you're a small business owner, a hobbyist, or just curious about the latest in garment decoration, this guide will walk you through everything you need to know about DTF transfers, from the basics to advanced tips for achieving professional results.
What Are DTF Transfers?
DTF stands for Direct to Film. It's a printing technique where a design is printed onto a special PET film using a DTF printer, then transferred onto fabric using a heat press. Unlike traditional methods like screen printing or vinyl cutting, DTF transfers allow you to print full-color, intricate designs with ease. The process involves printing a mirrored image onto the film, applying a special adhesive powder, and then heat-pressing it onto the garment. The result is a soft, flexible, and highly detailed print that feels great to the touch.
Why Choose DTF Transfers?
There are several reasons why DTF has become a favorite among print shops and DIY enthusiasts alike. First, it works on almost any fabric, including cotton, polyester, blends, and even tricky materials like nylon or leather. Second, the colors are exceptionally vibrant and can include gradients and fine details that would be difficult with other methods. Third, DTF transfers can be stored and applied later, making them perfect for on-demand printing and small batch orders. And let's not forget the cost: for short runs, DTF is often more affordable than screen printing because there are no setup fees. For larger orders, it still holds its own due to its speed and flexibility.
The DTF Printing Process Step by Step
Understanding the process helps you get the best results. Here's a breakdown of what happens from start to finish.
Step 1: Design and Print
First, you need a high-resolution design. Use software like Adobe Illustrator or Photoshop to create your artwork, ensuring it's at least 300 DPI. Then, print it onto a PET film using a DTF printer equipped with CMYK or CMYK+White ink. The white ink is crucial because it creates a base that makes colors pop on dark garments. Print the design in reverse (mirrored) so that when you transfer it, it appears correctly.
Step 2: Apply Adhesive Powder
Once printed, immediately shake a special hot-melt adhesive powder over the wet ink while it's still tacky. The powder sticks only to the ink. Then, remove the excess powder and partially cure it using a heat source like an oven or heat press set to around 160°C (320°F) for a few seconds. This makes the powder fuse with the ink, creating a strong bond.
Step 3: Press Onto the Garment
Now, place the film with the powder side down onto your garment. Using a heat press, apply medium pressure at about 160-170°C (320-338°F) for 10-15 seconds. Ensure even heat and pressure. Let it cool for a few seconds, then peel the film away. Your design is now transferred onto the fabric.
Step 4: Final Cure (Optional)
For added durability, some printers recommend a second press with a protective sheet (like Teflon or parchment paper) to fully cure the adhesive and ensure it bonds deeply with the fabric fibers. This step is especially useful for garments that will be washed frequently.
Essential Equipment for DTF Transfers
To get started, you'll need the following equipment:
- DTF Printer: This is a specialized inkjet printer that can handle white ink. Some popular models include the Epson F2100 (converted) or dedicated DTF printers like the Riicol or DTG2Go.
- Heat Press: A commercial heat press is essential for consistent results. You can use a clamshell or swing-away model, but make sure it reaches the required temperature and pressure.
- PET Film: This is the carrier film that you print on. It comes in rolls or sheets and must be compatible with your printer's ink.
- Adhesive Powder: A hot-melt powder that acts as the glue between the ink and fabric.
- Oven or Heat Gun: For pre-curing the adhesive powder after shaking. Some people use a dedicated curing oven, but a regular convection oven works fine.
DTF Transfers vs. Other Methods
How does DTF stack up against other popular custom printing techniques? Here's a quick comparison.
DTF vs. Screen Printing
Screen printing is great for large runs of simple designs, but it requires screens (one per color), which drives up setup costs. DTF transfers have no setup fees and are perfect for full-color, detailed images. For small to medium quantities, DTF is often more cost-effective and quicker to produce.
DTF vs. Vinyl Cutting
Vinyl cutting is limited to solid colors and simple shapes. DTF can produce any color, gradient, or photograph. Moreover, DTF prints have a softer feel, whereas vinyl can be stiff and prone to cracking after multiple washes.
DTF vs. Direct-to-Garment (DTG)
DTG is great for soft prints on light cotton, but it can be slow and struggles with dark or non-cotton fabrics. DTF transfers can be applied to virtually any fabric, and they allow you to print in bulk and then press on demand, which is more flexible.
Best Fabrics for DTF Transfers
One of the biggest advantages of DTF is its fabric versatility. However, some materials yield better results than others. Here are the top choices:
- Cotton: Works perfectly, especially for light-colored garments.
- Polyester: DTF adheres well, making it ideal for sportswear (though test for high-performance fabrics like those with moisture-wicking finishes).
- Cotton-Poly Blends: These are excellent because they combine the benefits of both fibers.
- Denim: DTF transfers can add striking prints to jeans and jackets.
- Canvas and Tote Bags: The transfer adheres well to thicker materials, allowing for durable decoration.
Common Mistakes to Avoid
Even experienced printers make errors. Here are some pitfalls to watch out for:
- Skipping Pre-Pressing: Always pre-press your garment for 1-2 seconds to remove wrinkles and moisture. This ensures better adhesion.
- Using Too Little Powder: If the powder is too thin, the transfer will crack or peel. Use enough to cover the ink evenly.
- Incorrect Temperature or Time: Too high heat can scorch the fabric, too low won't bond. Use a heat press with a digital display and calibration.
- Not Curing Properly: The adhesive powder needs sufficient heat to melt and penetrate the fabric. Follow the manufacturer's recommendations.
- Peeling Too Early: Wait for the film to cool slightly before peeling. If you peel too soon, the adhesive might pull off the design.
Tips for Achieving Professional Results
Want your DTF transfers to look like they came from a pro shop? Follow these tips:
- Invest in Good Equipment: A quality DTF printer and heat press make a world of difference. Cheap machines often lead to inconsistent results.
- Use High-Quality Inks: Opt for trusted ink brands to ensure color accuracy and durability.
- Calibrate Your Printer: Regularly perform nozzle checks and cleanings to avoid banding or missing colors.
- Test Your Settings: Every fabric and transfer paper is different. Do test prints on scrap fabric to dial in the perfect time and temperature.
- Handle the Film Carefully: Avoid touching the printed surface before pressing, as oils from your fingers can affect the transfer.
- Store Your Transfers Properly: If you're pre-printing transfers for later use, keep them in a dry, dust-free environment to prevent contamination.
Frequently Asked Questions
Can I use DTF transfers on dark colors?
Yes, absolutely. One of the main benefits of DTF transfers is that they include a white ink layer, which acts as an opaque base. This ensures that even on black or dark garments, your design retains its vibrant colors. Just make sure to print with a sufficient amount of white ink and use a high-quality adhesive powder for strong bonding.
How long do DTF transfers last?
With proper application and care, DTF transfers can last as long as the garment itself. They are resistant to cracking, peeling, and fading. However, to maximize longevity, wash the garment inside out in cold water and avoid using harsh detergents or bleach. Air drying or low-heat tumble drying is also recommended.
Are DTF transfers suitable for small business?
Definitely. DTF transfers are perfect for small businesses because they require minimal upfront investment compared to screen printing setups. You can produce high-quality custom apparel on demand without worrying about minimum order quantities. This flexibility allows you to test new designs and offer personalized products without holding large inventory.
Can I use DTF transfers on stretchy fabrics?
Yes, DTF transfers are quite flexible and can stretch with the fabric without cracking. This makes them ideal for activewear and sportswear. However, always test on a small piece first to ensure the adhesive holds. For very high-stretch materials, consider using a polyurethane-based adhesive or reducing the stretching of the garment during wear.
Do I need a special heat press for DTF?
You can use any standard heat press that provides even pressure and temperature control. A heat press with a digital temperature display is recommended for accuracy. Some people use a clamshell or swing-away press. Just ensure the platen is large enough to cover the transfer area, and always use a Teflon sheet to protect both the garment and the film.
Final Thoughts
DTF transfers have revolutionized the custom printing industry, making it easier than ever to create stunning apparel. Whether you're a seasoned professional or a beginner, this method offers unmatched flexibility, quality, and cost-effectiveness. By understanding the process, investing in the right equipment, and following best practices, you can produce prints that are both beautiful and durable. So why not give it a try? Start with a small project, experiment, and you'll soon see why DTF is the go-to choice for many printers.